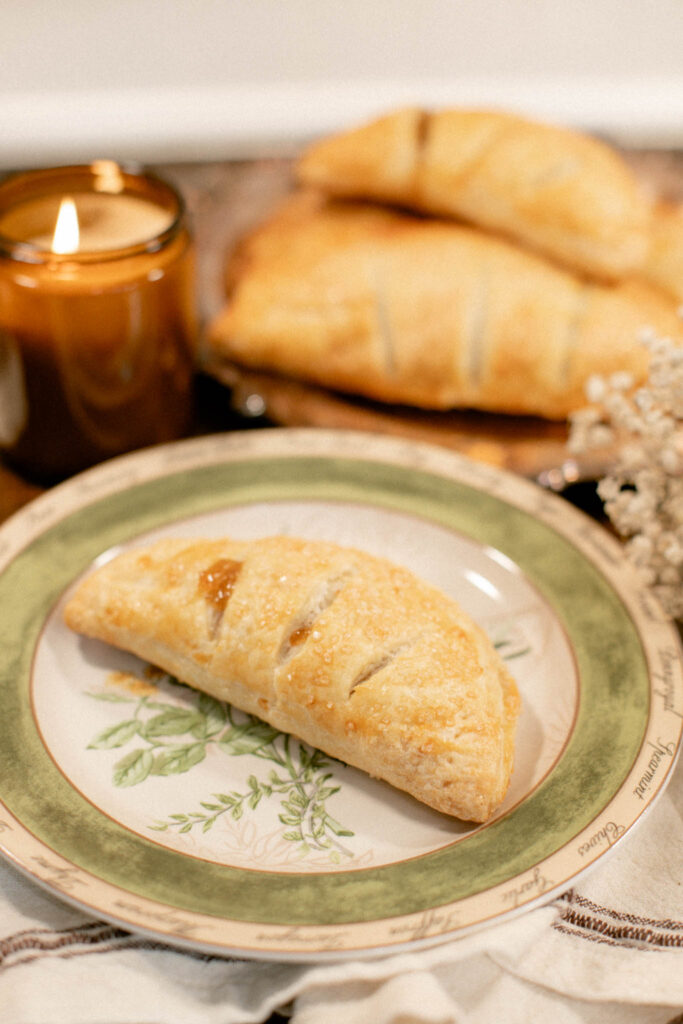
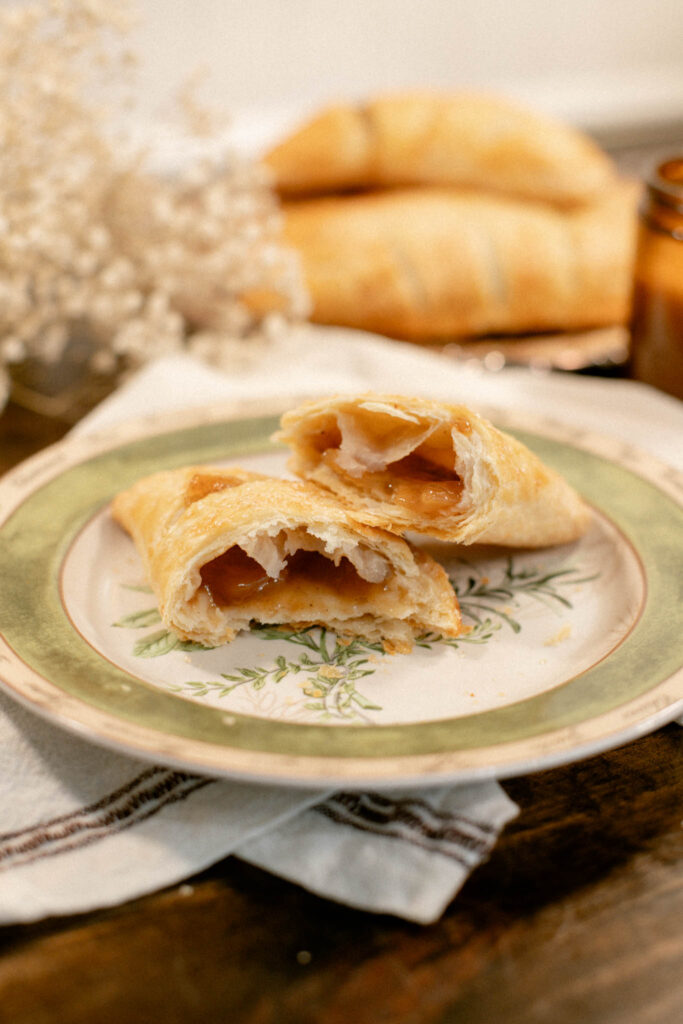
Baking a batch of apple hand pies feels like pressing pause on everything else. The pastry turns golden and crisp in the oven, the filling bubbles up with cinnamon and warm spice, and for a little while, your kitchen smells like something out of a quiet daydream. They’re simple to make, perfectly imperfect, and somehow more satisfying because of it.
This is the kind of recipe you come back to—not just for the flaky crust or sweet apple filling, but for the way it slows you down. No pie pan. No fuss. Just soft dough, cozy intention, and a warm little moment you can hold in your hands.
This post may contain affiliate links, please read our disclosure policy for details.
Why You’ll Love This Recipe
Ingredients:
For the pastry dough
For the filling
To finish
Cozy Kitchen Notes
Make the dough ahead: You can prep the pastry the night before—just wrap and refrigerate. It makes the next day’s baking even softer and slower.
Shortcut-friendly: Canned apple pie filling keeps this recipe easy and cozy. Chop it roughly if you prefer a neater bite.
Reheat for cozy leftovers: Pop leftover pies in a 300°F oven for 8–10 minutes. The crust crisps back up and your kitchen smells like fall all over again.
Instructions
- Make the dough: In a large bowl, whisk together the flour, salt, and sugar. Add cold, cubed butter and use a pastry cutter or your fingers to cut it into the flour until you have pea-sized crumbs.
- Add liquid: Stir the apple cider vinegar into 6 tablespoons of ice water. Drizzle over the flour mixture, stirring gently with a fork until the dough just comes together. Add an extra tablespoon or two of water if needed.
- Chill the dough: Divide the dough in half and shape into discs. Wrap in parchment or plastic wrap and chill for at least 30 minutes.
- Preheat the oven: Set your oven to 375°F (190°C) and line a baking sheet with parchment paper.
- Roll and cut: On a lightly floured surface, roll out one chilled dough disc to about ⅛ inch thick. Cut into 4-inch rounds or rectangles using a biscuit cutter, cookie cutter, or glass.
- Fill the pies: Spoon about 1½ tablespoons of apple pie filling onto half of the dough pieces. If the filling is chunky, give it a quick chop before using.
- Seal and crimp: Top with the remaining dough pieces. Press the edges to seal, then crimp with a fork. Transfer to the baking sheet and chill for 10–15 minutes.
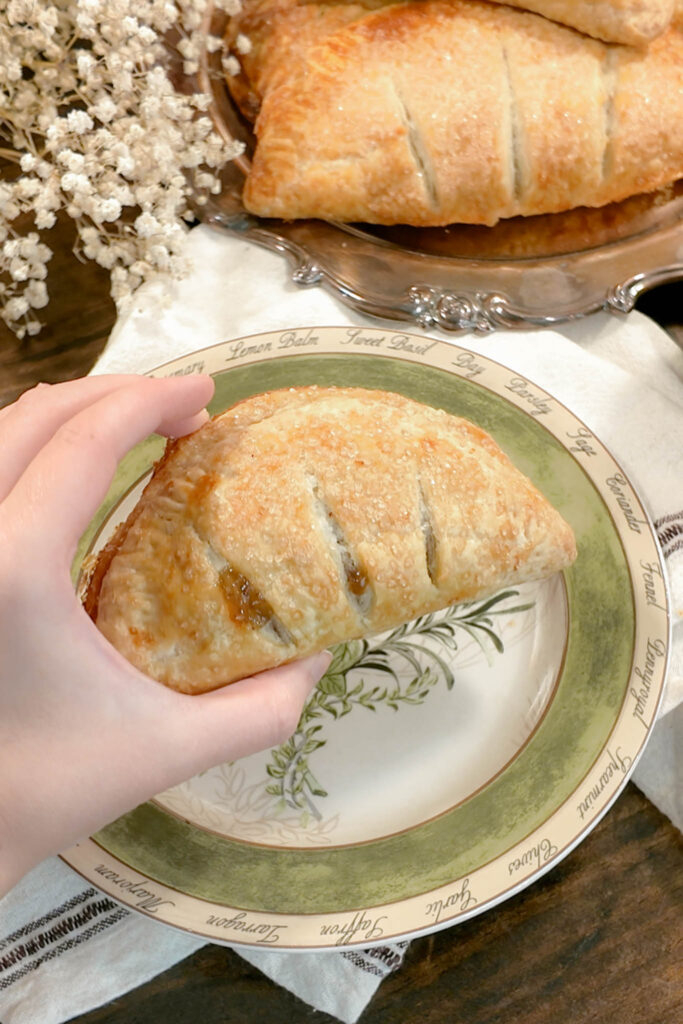
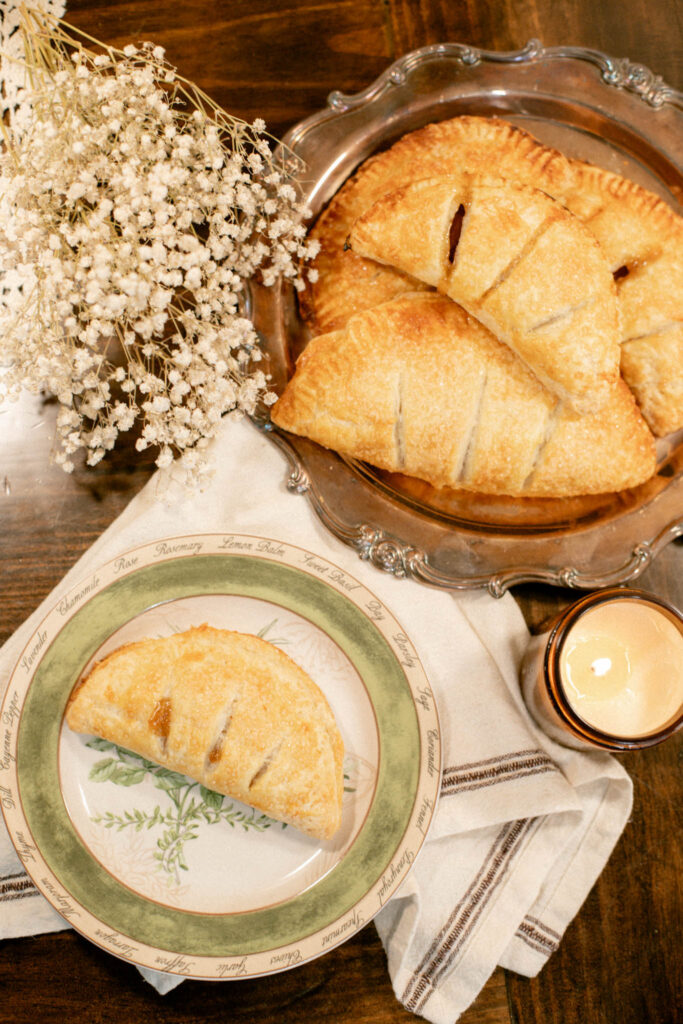
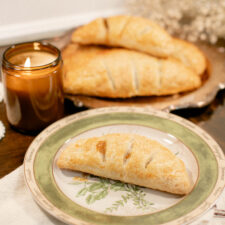
- Egg wash and vent: Brush the tops with beaten egg and sprinkle with sugar (optional). Cut a small slit or “X” in the top of each hand pie to vent steam.
- Bake: Bake for 22–26 minutes or until golden brown and crisp. Let cool slightly before serving warm.
FAQ
Easy Apple Hand Pies with Flaky Homemade Pastry
Ingredients
Pastry Dough:
- 2 ½ cups all-purpose flour
- 1 tsp salt
- 1 tbsp sugar
- 1 cup 2 sticks cold unsalted butter, cubed
- 6-8 tbsp ice water
- 1 tsp apple cider vinegar
Filling:
- 1 to 1½ cups apple pie filling store-bought or homemade
To Finish:
- 1 egg for egg wash
- Turbinado or sanding sugar optional
Instructions
- Make the dough: In a large bowl, whisk together the flour, salt, and sugar. Add cold, cubed butter and use a pastry cutter or your fingers to cut it into the flour until you have pea-sized crumbs.
- Add liquid: Stir the apple cider vinegar into 6 tablespoons of ice water. Drizzle over the flour mixture, stirring gently with a fork until the dough just comes together. Add an extra tablespoon or two of water if needed.
- Chill the dough: Divide the dough in half and shape into discs. Wrap in parchment or plastic wrap and chill for at least 30 minutes.
- Preheat the oven: Set your oven to 375°F (190°C) and line a baking sheet with parchment paper.
- Roll and cut: On a lightly floured surface, roll out one chilled dough disc to about ⅛ inch thick. Cut into 4-inch rounds or rectangles using a biscuit cutter, cookie cutter, or glass.
- Fill the pies: Spoon about 1½ tablespoons of apple pie filling onto half of the dough pieces. If the filling is chunky, give it a quick chop before using.
- Seal and crimp: Top with the remaining dough pieces. Press the edges to seal, then crimp with a fork. Transfer to the baking sheet and chill for 10–15 minutes.
- Egg wash and vent: Brush the tops with beaten egg and sprinkle with sugar (optional). Cut a small slit or “X” in the top of each hand pie to vent steam.
- Bake: Bake for 22–26 minutes or until golden brown and crisp. Let cool slightly before serving warm.
Notes
- Make it ahead: The pastry dough can be made up to 2 days in advance and kept chilled. You can also freeze the dough for later—just thaw overnight in the fridge before using.
- Canned filling shortcut: Store-bought apple pie filling keeps this recipe simple and cozy. If it’s chunky, give it a rough chop so it fits neatly into the pies.
- Storage: Hand pies are best the day they’re baked but can be stored in an airtight container at room temperature for up to 2 days. Reheat in a 300°F oven for 8–10 minutes to bring back the flake and warmth.
- Freeze before baking: Assemble the pies and freeze them unbaked on a tray. Once solid, transfer to a freezer bag. Bake from frozen, adding 5–7 minutes to the bake time.
Did this inspire you?
I hope this post inspired you to add a little more whimsy into your life. If you try any of these ideas, I’d love to see—feel free to tag me on IG @rubyscozycottage